
Update a server is not a hard task to be done, especially if you have a WSUS server in place to update others, you may easily update hundreds or even thousand servers at a time with a click of a button.
In this post we will show you another alternative that can help you with the important task of patching servers.
1 – What is Azure Update Management?
Azure update Management is a feature that comes with Azure automation Account and allows you to manage operating system updates for your Windows and Linux machines in Azure, in on-premises environments, and in other cloud environments.
It requires the automation account to be linked with a log analytics workspace to do its job. You can’t link automation accounts with workspaces in any region, you have to check this supported mapping link.
After releasing an update package, it will take 2 or 3 hours to show up for Linux machines to be able to download it. For Windows, this time can be 12 to 15 hours to show up in the assessment portal.
The following addresses are required for update management to work well and the communication will be established over 443 port:
| Azure Public | Azure Government |
|---|---|
*.ods.opinsights.azure.com | *.ods.opinsights.azure.us |
*.oms.opinsights.azure.com | *.oms.opinsights.azure.us |
*.blob.core.windows.net | *.blob.core.usgovcloudapi.net |
*.azure-automation.net | *.azure-automation.us |
2 – Enabling Update Management
First things first, to enable Update Management we have to have an automation account, let’s review how to create one:
On your Azure account, search for “Automation Account” and click “Add“.
You will get the following screen:

Powershell Equivalent:
$resourceGroup = "Cloudshell-DSC"
$AutomationACCName = "Cloudshell-DSC"
$location = "canadacentral"

#To Connect to your account
Connect-AzAccount

#To Create a new Resource Group
New-AzResourceGroup -Name $resourceGroup -Location $location

#To create a new Automation Account
New-AzAutomationAccount -Name $AutomationACCName -ResourceGroupName $resourceGroup -Location $location
After creating the automation account, we have to link a log analytics space to this account. Select Update Management >> Create New Workspace and hit Enable button:

Click on Update Management again to refresh the page and make sure everything is OK.
3 – Adding Azure VMs to Update Management
Now that we have the resources needed, let’s start adding the VMs to be assessed and monitored by Azure Update Management.

Here we have to select the subscription where the Vms are located, select the Vms to be monitored and click enable when you’re done:

4 – Adding Non-Azure Vms to Update Management
To install the agents on the non-azure servers, the best approach would be using Azure DSC, which is another feature for Azure automation account. I have another post where I provide you with details on how to use that feature. Here is the post.
The only thing you have to do is to change the 4.2 section there to use the following code:
Configuration MMAgent
{
    $OIPackageLocalPath = "C:\Deploy\MMASetup-AMD64.exe"
    $OPSINSIGHTS_WS_ID = Get-AutomationVariable -Name "OPSINSIGHTS_WS_ID"
    $OPSINSIGHTS_WS_KEY = Get-AutomationVariable -Name "OPSINSIGHTS_WS_KEY"

    Import-DscResource -ModuleName xPSDesiredStateConfiguration
    Import-DscResource -ModuleName PSDesiredStateConfiguration

    Node OMSnode {
        Service OIService
        {
            Name = "HealthService"
            State = "Running"
            DependsOn = "[Package]OI"
        }

        xRemoteFile OIPackage {
            Uri = "https://go.microsoft.com/fwlink/?LinkId=828603"
            DestinationPath = $OIPackageLocalPath
        }

        Package OI {
            Ensure = "Present"
            Path  = $OIPackageLocalPath
            Name = "Microsoft Monitoring Agent"
            ProductId = "774E20C6-9B94-48F2-99C9-8E1FAE17C960"
            Arguments = '/C:"setup.exe /qn NOAPM=1 ADD_OPINSIGHTS_WORKSPACE=1 OPINSIGHTS_WORKSPACE_ID=' + $OPSINSIGHTS_WS_ID + ' OPINSIGHTS_WORKSPACE_KEY=' + $OPSINSIGHTS_WS_KEY + ' AcceptEndUserLicenseAgreement=1"'
            DependsOn = "[xRemoteFile]OIPackage"
        }
    }
}
To configure the Agent to be linked with the Log Analytics that we created before, you have to create 2 variables on this automation account that will be fetched by the configuration file above. To do so, go to variables >> Add a variable:

You have to create to name the variables like this:
OPSINSIGHTS_WS_ID = Workspace ID
OPSINSIGHTS_WS_KEY = Workspace Key
To find those, go to the linked workspace:
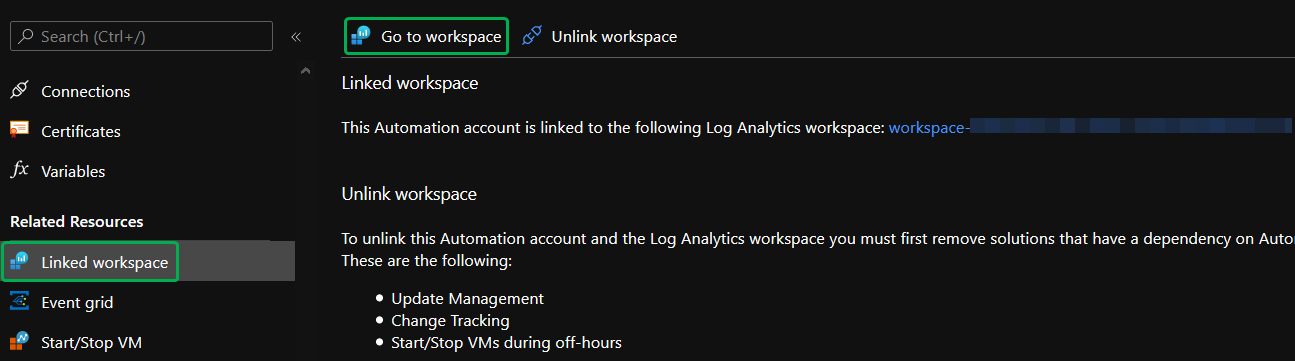
On the workspace, under settings, select Agents management and you’ll see both Id and Key:

Give it the name mentioned before and the value found on figure 7. Create one variable per value:

4.1 – Creating the Variables using Powershell
If you want to script this process, you can use Powershell to set the variables. Don’t forget to change $IDValue and $KeyValue for the corresponding values that we found on Figure 7:
$rg = "UpdateManagement-RG"
$AutoAccount = "Cloudshell-Update"

$IDVariable = "OPSINSIGHTS_WS_ID"
$IdValue =  "<WorkspaceID>"

$KeyVariable = "OPSINSIGHTS_WS_KEY"
$KeyValue =  "<WorkspaceKey>"


New-AzAutomationVariable -AutomationAccountName $AutoAccount  -Name $IDVariable  -ResourceGroupName $rg -Value $IdValue -Encrypted $False
New-AzAutomationVariable -AutomationAccountName $AutoAccount  -Name $KeyVariable  -ResourceGroupName $rg -Value $KeyValue -Encrypted $False
The final result looks like this:

Once you have done all the steps above and added the servers successfully, you have to wait at least 15 minutes for the agent to report to the log analytics space. After that, it’s possible for you to go to Update Management >> Manage Machines, and from there, you have the option to whether enable update management on all available machines that connects to that workspace, to all available and future machines that connect to the space, or to enable only on selected machines:

4.2 – Adding Linux non-Azure Machines to Update Management
For Linux machines, go to your linked workspace, under settings select Agents Management, select the Linux servers tab and copy the Download and onboard agent for Linux box:

Make sure you have wget and Python 2 or 3 installed on your linux vm, paste it on your terminal and run it with sudo privileges.
Note: At the time of this writing, Centos 8.2 version is not supported. Please check the supported versions here.
Once you’ve added all the machines you need, you will have a similar result like this:

If we click on Missing updates tab, we will be able to see what updates are missing on the vms, as well as their classifications:

5 – Scheduling Update Deployment
With all machines added to the Update Management tab, it’s time to schedule their update deployment. Let’s see how to do that.
Select Update Deployment, and search for Schedule Update Deployment:

On the new update deployment tab, select the name, the operating system for this group, (You can’t mix Windows with Linux, you have to create one update deployment per OS) and select Machines to Update:

Here you have to select the machines you want for this deployment. Select Machines on type to filter the machines that are reporting to this log Analytics space, and then select all the machines you want:

After that, you have to select the update classifications you want, the schedule settings, the pre-scripts and post scripts if you want to perform any task before or after the updates.
Maintenance window time is the time that the machine has to perform the update, but keep in mind that the last 20 minutes are dedicated for the machine to restart and the remaining updates will be postponed to the next update schedule (if you have configured recurrence on schedule settings).

When you are happy with the configurations, hit Create.
To check how many deployment schedules you have, simply go to deployment schedules tab to see all of them:

After running the update deployment, you will have results like this:
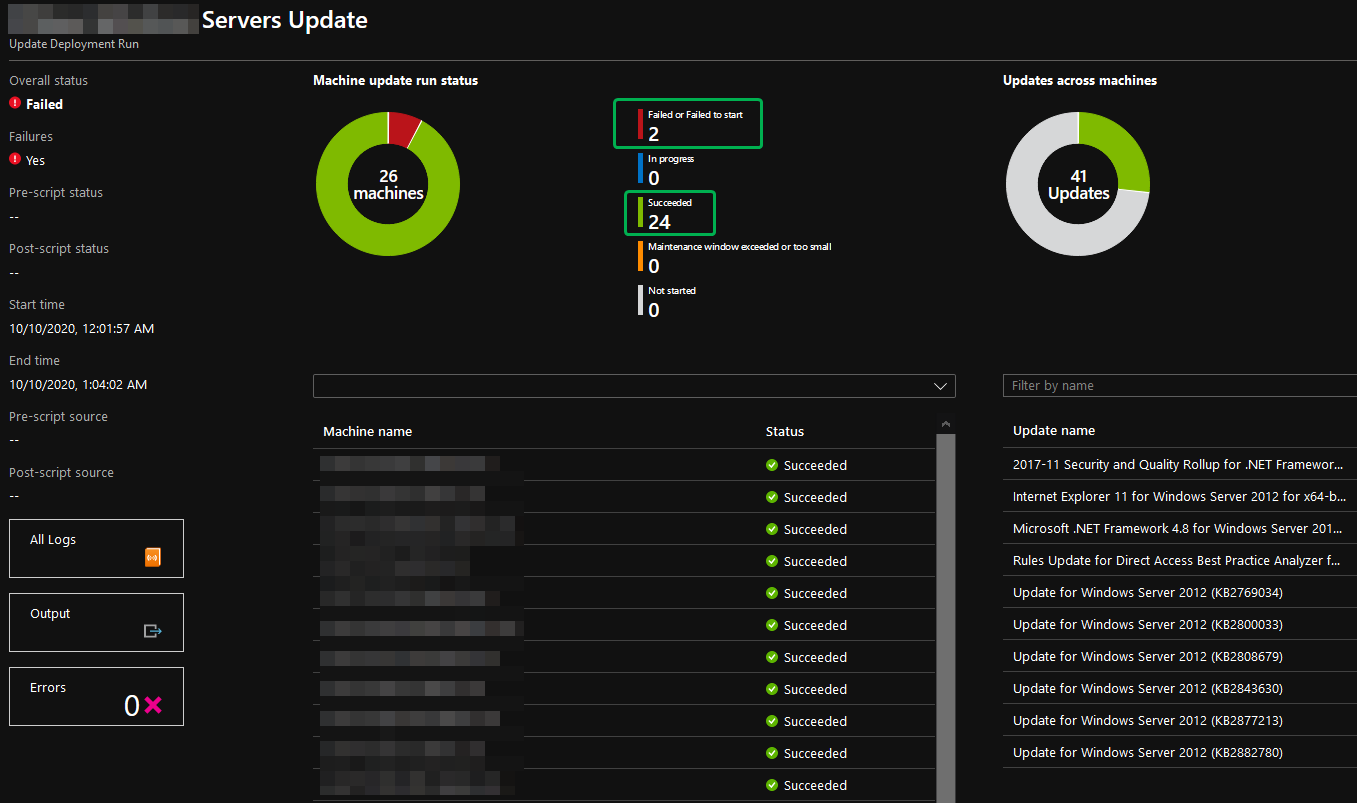
As you can see on figure 19, although 24 of 26 machines have been succeeded on their updates and only 2 have failed, it took us to overall status of failed, but it’s not the end of the world, sometimes the virtual machine didn’t have enough time to download the update, or it was turned off for some reason, just find out the reason by querying the logs and prepare for the next update deployment.
For the status of the machines, the available values are:
- Not attempted – The update wasn’t installed because there was insufficient time available, based on the defined maintenance window duration.
- Not selected – The update wasn’t selected for deployment.
- Succeeded – The update succeeded.
- Failed – The update failed.
In this post, you’ve learned how to update Azure and non-Azure machines using Update deployment, a feature from Automation Account available on Azure. If you have any questions or if you see anything wrong, leave us a comment on the section below. See you in the next post!

Great article Rafael – do you know what determines an update as “Not Selected” for deployments when all the options are selected under Update Classifications? Im seeing some machines skip updates and in the report it shows them as Not Selected.
LikeLike
Hi Glen,
As per Microsoft says, this could be:
“Not included through classification criteria / explicit inclusion, or, explicitly excluded as part of the update deployment settings.”
I can’t see your logs, but on my side, I always get some machines with the “not selected” state, I would say it is either because the machine already has that update or the machine is not eligible to receive the update (i.e. waiting for a previous update before getting that one).
LikeLike